


If you’re using Printful for print-on-demand, getting your product templates into your store is a must. But here’s the problem—Printful doesn’t just “move” templates automatically. Instead, you have to push them as products to your store.
I’ve been through this process, and I know it can feel a little confusing. So, I’m breaking it down step by step, making it super simple, no matter if you’re using Shopify, Etsy, WooCommerce, Wix, or another platform.
Follow these steps, and you’ll have your products live in no time.
1. Log Into Printful
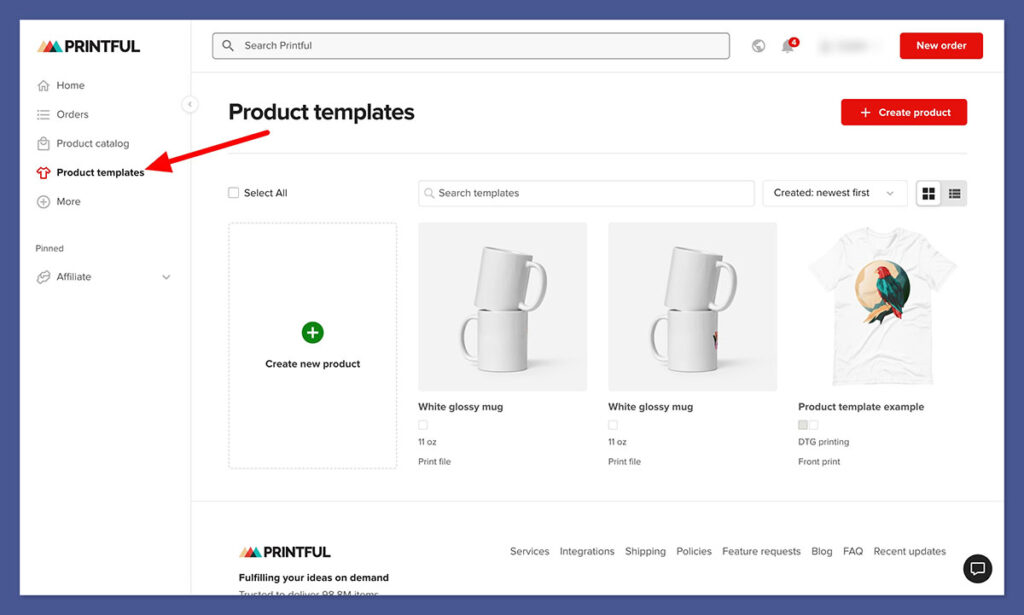
First things first, I log into my Printful account. This is where all my saved product templates live.
Here’s how to get there:
- Head over to the Printful dashboard.
- Look for the “Product Templates” section in the menu.
- Click on it, and you’ll see all the designs you’ve created.
If you don’t have any templates yet, you’ll need to create one first by clicking “Create Template.” This is where you choose a product, add your design, and set up basic settings like size, colors, and placement.
Once you have your template ready, it’s time to move it to your store.
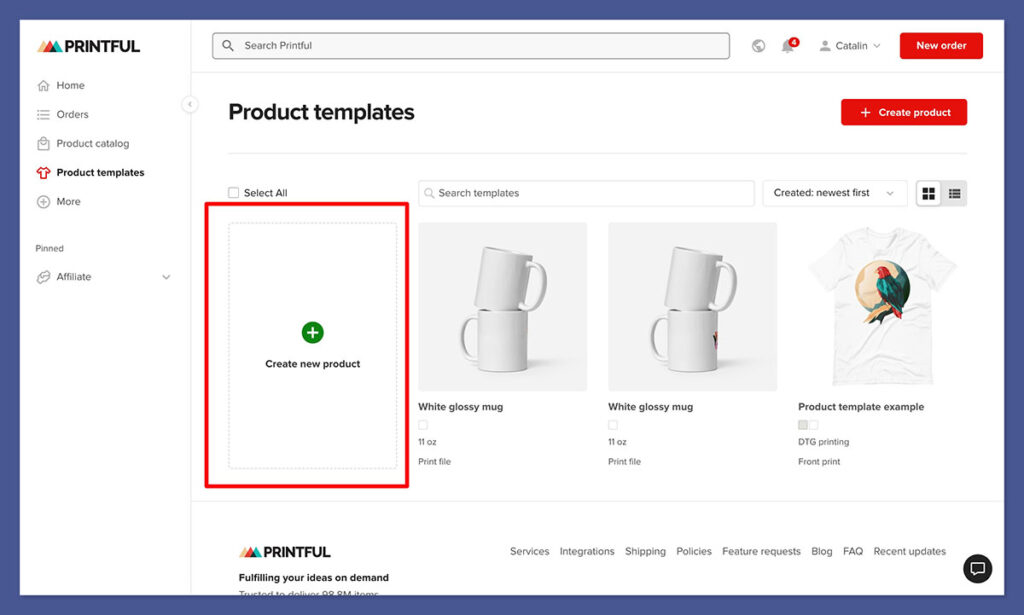
2. Choose the Template You Want to Move
Now that I’m in the Product Templates section, I can look for the specific template I want to move. This is an important step because Printful won’t let you bulk move templates—you have to push them one by one as products.
Here’s what I do:
- Scroll through my saved templates.
- Click on the one I want to add to my store.
- Click the “Add to Store” button.
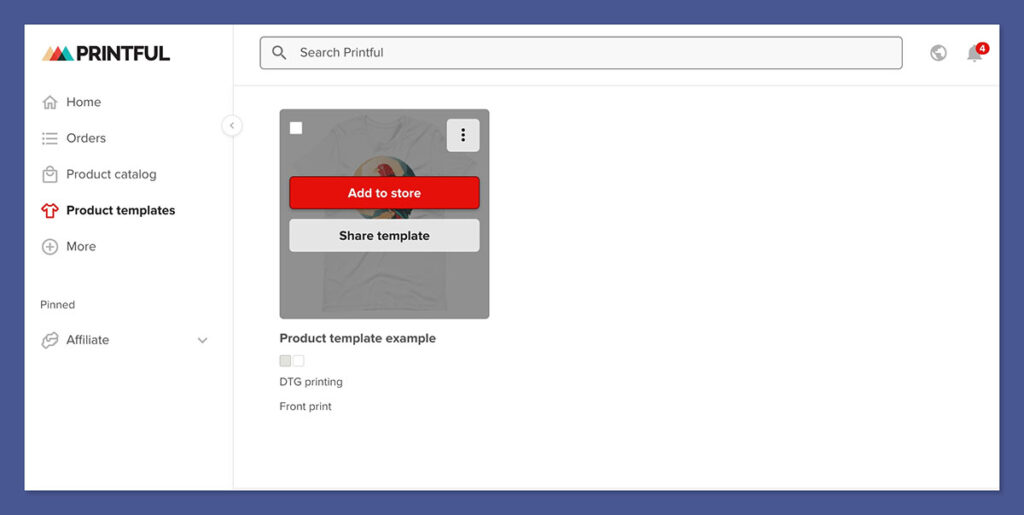
At this point, Printful will ask me which store I want to add it to.
3. Select Your Store
Printful integrates with multiple eCommerce platforms, so I pick the right one from the list. The most common options are:
- Shopify (perfect for branded stores)
- Etsy (great for handmade or POD sellers)
- WooCommerce (for WordPress-based stores)
- Wix (for beginners and small businesses)
- BigCommerce, eBay, Amazon, and more

Once I select my store, Printful automatically syncs with my account. If I haven’t connected my store yet, Printful will prompt me to do so before moving forward.
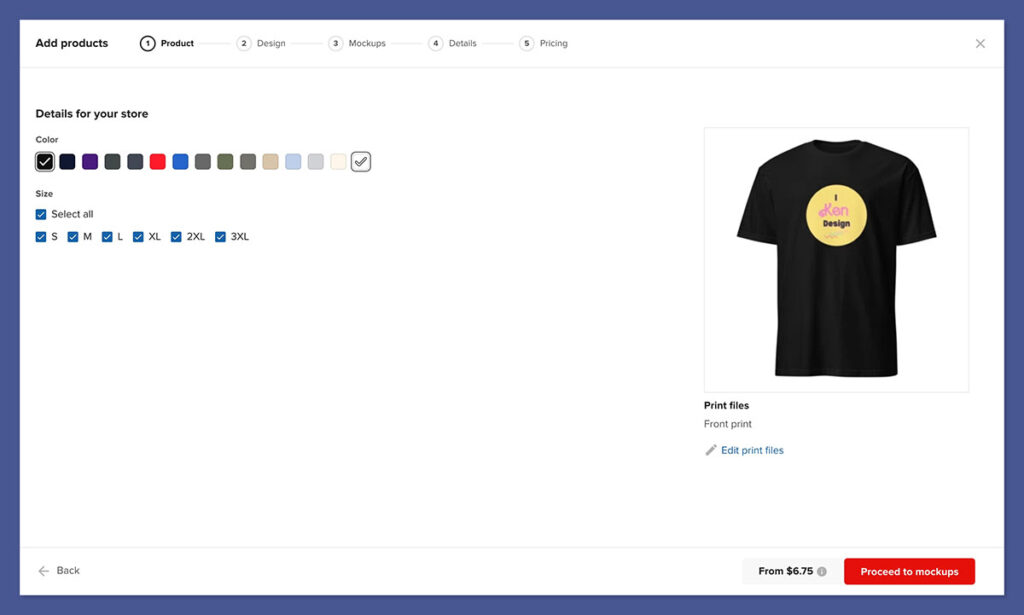
4. Customize Product Details
Before my product goes live, I need to tweak some important details. Printful lets me edit:
- Product title – I make sure it’s clear and includes relevant keywords.
- Description – I add compelling product details and SEO keywords.
- Pricing – I set my profit margin based on Printful’s base price.
- Mockup images – Printful provides mockups, but I can also upload my own.
This step is crucial because once the product is in my store, I want it to be fully optimized for sales.
Pro Tip: I always rewrite the description instead of using Printful’s default one. It helps with SEO and makes my product stand out.
5. Publish the Product
Once everything looks good, I hit “Submit to Store.”
Printful then:
- Syncs the product with my store.
- Uploads all the mockup images.
- Lists the product as a draft or active (depending on my store settings).
At this point, I double-check my store to ensure everything looks good.
6. Final Check and SEO Optimization
Now that my product is live, I take a few extra steps to make sure it’s fully optimized for sales:
- Check product page layout – I make sure the images and description look right.
- Adjust SEO settings – I update the meta title, description, and URL slug for better search visibility.
- Test the buying process – I add the product to my cart to see if everything works smoothly.
Once that’s done, my Printful template is officially moved to my store, ready for customers to buy!
Final Thoughts
Moving Printful templates to your store isn’t hard, but you do have to go step by step. The key is making sure your product details are optimized before publishing.
By following this process, I can quickly turn my Printful templates into live products and start making sales.


