


In this article, you will learn how the ReAct (Reasoning + Acting) pattern works and how to implement it with LangGraph — first with a simple, hardcoded loop and then with an LLM-driven agent.
Topics we will cover include:
- The ReAct cycle (Reason → Act → Observe) and why it’s useful for agents.
- How to model agent workflows as graphs with LangGraph.
- Building a hardcoded ReAct loop, then upgrading it to an LLM-powered version.
Let’s explore these techniques.
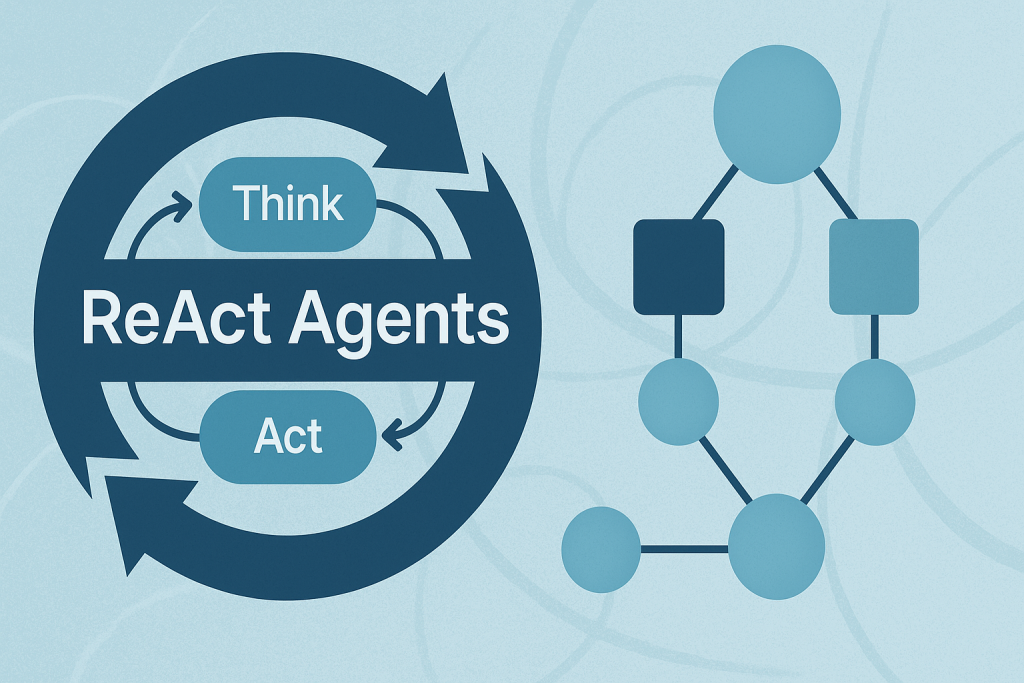
Building ReAct Agents with LangGraph: A Beginner’s Guide
Image by Author
What is the ReAct Pattern?
ReAct (Reasoning + Acting) is a common pattern for building AI agents that think through problems and take actions to solve them. The pattern follows a simple cycle:
- Reasoning: The agent thinks about what it needs to do next.
- Acting: The agent takes an action (like searching for information).
- Observing: The agent examines the results of its action.
This cycle repeats until the agent has gathered enough information to answer the user’s question.
Why LangGraph?
LangGraph is a framework built on top of LangChain that lets you define agent workflows as graphs. A graph (in this context) is a data structure consisting of nodes (steps in your process) connected by edges (the paths between steps). Each node in the graph represents a step in your agent’s process, and edges define how information flows between steps. This structure allows for complex flows like loops and conditional branching. For example, your agent can cycle between reasoning and action nodes until it gathers enough information. This makes complex agent behavior easy to understand and maintain.
Tutorial Structure
We’ll build two versions of a ReAct agent:
- Part 1: A simple hardcoded agent to understand the mechanics.
- Part 2: An LLM-powered agent that makes dynamic decisions.
Part 1: Understanding ReAct with a Simple Example
First, we’ll create a basic ReAct agent with hardcoded logic. This helps you understand how the ReAct loop works without the complexity of LLM integration.
Setting Up the State
Every LangGraph agent needs a state object that flows through the graph nodes. This state serves as shared memory that accumulates information. Nodes read the current state and add their contributions before passing it along.
|
from langgraph.graph import StateGraph, END from typing import TypedDict, Annotated import operator
# Define the state that flows through our graph class AgentState(TypedDict): messages: Annotated[list, operator.add] next_action: str iterations: int |
Key Components:
StateGraph: The main class from LangGraph that defines our agent’s workflow.AgentState: A TypedDict that defines what information our agent tracks.messages: Usesoperator.addto accumulate all thoughts, actions, and observations.next_action: Tells the graph which node to execute next.iterations: Counts how many reasoning cycles we’ve completed.
Creating a Mock Tool
In a real ReAct agent, tools are functions that perform actions in the world — like searching the web, querying databases, or calling APIs. For this example, we’ll use a simple mock search tool.
|
# Simple mock search tool def search_tool(query: str) -> str: # Simulate a search – in real usage, this would call an API responses = { “weather tokyo”: “Tokyo weather: 18°C, partly cloudy”, “population japan”: “Japan population: approximately 125 million”, } return responses.get(query.lower(), f“No results found for: {query}”) |
This function simulates a search engine with hardcoded responses. In production, this would call a real search API like Google, Bing, or a custom knowledge base.
The Reasoning Node — The “Brain” of ReAct
This is where the agent thinks about what to do next. In this simple version, we’re using hardcoded logic, but you’ll see how this becomes dynamic with an LLM in Part 2.
|
# Reasoning node – decides what to do def reasoning_node(state: AgentState): messages = state[“messages”] iterations = state.get(“iterations”, 0)
# Simple logic: first search weather, then population, then finish if iterations == 0: return {“messages”: [“Thought: I need to check Tokyo weather”], “next_action”: “action”, “iterations”: iterations + 1} elif iterations == 1: return {“messages”: [“Thought: Now I need Japan’s population”], “next_action”: “action”, “iterations”: iterations + 1} else: return {“messages”: [“Thought: I have enough info to answer”], “next_action”: “end”, “iterations”: iterations + 1} |
How it works:
The reasoning node examines the current state and decides:
- Should we gather more information? (return
"action") - Do we have enough to answer? (return
"end")
Notice how each return value updates the state:
- Adds a “Thought” message explaining the decision.
- Sets
next_actionto route to the next node. - Increments the iteration counter.
This mimics how a human would approach a research task: “First I need weather info, then population data, then I can answer.”
The Action Node — Taking Action
Once the reasoning node decides to act, this node executes the chosen action and observes the results.
|
# Action node – executes the tool def action_node(state: AgentState): iterations = state[“iterations”]
# Choose query based on iteration query = “weather tokyo” if iterations == 1 else “population japan” result = search_tool(query)
return {“messages”: [f“Action: Searched for ‘{query}'”, f“Observation: {result}”], “next_action”: “reasoning”}
# Router – decides next step def route(state: AgentState): return state[“next_action”] |
The ReAct Cycle in Action:
- Action: Calls the search_tool with a query.
- Observation: Records what the tool returned.
- Routing: Sets next_action back to “reasoning” to continue the loop.
The router function is a simple helper that reads the next_action value and tells LangGraph where to go next.
Building and Executing the Graph
Now we assemble all the pieces into a LangGraph workflow. This is where the magic happens!
|
1 2 3 4 5 6 7 8 9 10 11 12 13 14 15 16 17 18 19 20 21 22 23 24 |
# Build the graph workflow = StateGraph(AgentState) workflow.add_node(“reasoning”, reasoning_node) workflow.add_node(“action”, action_node)
# Define edges workflow.set_entry_point(“reasoning”) workflow.add_conditional_edges(“reasoning”, route, { “action”: “action”, “end”: END }) workflow.add_edge(“action”, “reasoning”)
# Compile and run app = workflow.compile()
# Execute result = app.invoke({“messages”: [“User: Tell me about Tokyo and Japan”], “iterations”: 0, “next_action”: “”})
# Print the conversation flow print(“\n=== ReAct Loop Output ===”) for msg in result[“messages”]: print(msg) |
Understanding the Graph Structure:
- Add Nodes: We register our reasoning and action functions as nodes.
- Set Entry Point: The graph always starts at the reasoning node.
- Add Conditional Edges: Based on the reasoning node’s decision:
- If
next_action == "action"→ go to the action node. - If
next_action == "end"→ stop execution.
- If
- Add Fixed Edge: After action completes, always return to reasoning.
The app.invoke() call kicks off this entire process.
Output:
|
=== ReAct Loop Output === User: Tell me about Tokyo and Japan
Thought: I need to check Tokyo weather Action: search(‘weather tokyo’) Observation: Tokyo weather: 18°C, partly cloudy
Thought: Now I need Japan‘s population Action: search(‘population japan‘) Observation: Japan population: approximately 125 million
Thought: I have enough info to answer |
Now let’s see how LLM-powered reasoning makes this pattern truly dynamic.
Part 2: LLM-Powered ReAct Agent
Now that you understand the mechanics, let’s build a real ReAct agent that uses an LLM to make intelligent decisions.
Why Use an LLM?
The hardcoded version works, but it’s inflexible — it can only handle the exact scenario we programmed. An LLM-powered agent can:
- Understand different types of questions.
- Decide dynamically what information to gather.
- Adapt its reasoning based on what it learns.
Key Difference
Instead of hardcoded if/else logic, we’ll prompt the LLM to decide what to do next. The LLM becomes the “reasoning engine” of our agent.
Setting Up the LLM Environment
We’ll use OpenAI’s GPT-4o as our reasoning engine, but you could use any LLM (Anthropic, open-source models, etc.).
|
from langgraph.graph import StateGraph, END from typing import TypedDict, Annotated import operator import os from openai import OpenAI
client = OpenAI(api_key=os.environ.get(“OPENAI_API_KEY”))
class AgentStateLLM(TypedDict): messages: Annotated[list, operator.add] next_action: str iteration_count: int |
New State Definition:
AgentStateLLM is similar to AgentState, but we’ve renamed it to distinguish between the two examples. The structure is identical — we still track messages, actions, and iterations.
The LLM Tool — Gathering Information
Instead of a mock search, we’ll let the LLM answer queries using its own knowledge. This demonstrates how you can turn an LLM into a tool!
|
def llm_tool(query: str) -> str: “”“Let the LLM answer the query directly using its knowledge”“” response = client.chat.completions.create( model=“gpt-4o”, max_tokens=150, messages=[{“role”: “user”, “content”: f“Answer this query briefly: {query}”}] ) return response.choices[0].message.content.strip() |
This function makes a simple API call to GPT-4 with the query. The LLM responds with factual information, which our agent will use in its reasoning.
Note: In production, you might combine this with web search, databases, or other tools for more accurate, up-to-date information.
LLM-Powered Reasoning — The Core Innovation
This is where ReAct truly shines. Instead of hardcoded logic, we prompt the LLM to decide what information to gather next.
|
1 2 3 4 5 6 7 8 9 10 11 12 13 14 15 16 17 18 19 20 21 22 23 24 25 26 27 28 29 |
def reasoning_node_llm(state: AgentStateLLM): iteration_count = state.get(“iteration_count”, 0) if iteration_count >= 3: return {“messages”: [“Thought: I have gathered enough information”], “next_action”: “end”, “iteration_count”: iteration_count}
history = “\n”.join(state[“messages”]) prompt = f“”“You are an AI agent answering: “Tell me about Tokyo and Japan“
Conversation so far: {history}
Queries completed: {iteration_count}/3
You MUST make exactly 3 queries to gather information. Respond ONLY with: QUERY:
Do NOT be conversational. Do NOT thank the user. ONLY output: QUERY:
decision = client.chat.completions.create( model=“gpt-4o”, max_tokens=100, messages=[{“role”: “user”, “content”: prompt}] ).choices[0].message.content.strip()
if decision.startswith(“QUERY:”): return {“messages”: [f“Thought: {decision}”], “next_action”: “action”, “iteration_count”: iteration_count} return {“messages”: [f“Thought: {decision}”], “next_action”: “end”, “iteration_count”: iteration_count} |
How This Works:
- Context Building: We include the conversation history so the LLM knows what’s already been gathered.
- Structured Prompting: We give clear instructions to output in a specific format (
QUERY:). - Iteration Control: We enforce a maximum of 3 queries to prevent infinite loops.
- Decision Parsing: We check if the LLM wants to take action or finish.
The Prompt Strategy:
The prompt tells the LLM:
- What question it’s trying to answer
- What information has been gathered so far
- How many queries it’s allowed to make
- Exactly how to format its response
- To not be conversational
LLMs are trained to be helpful and chatty. For agent workflows, we need concise, structured outputs. This directive keeps responses focused on the task.
Executing the Action
The action node works similarly to the hardcoded version, but now it processes the LLM’s dynamically generated query.
|
def action_node_llm(state: AgentStateLLM): last_thought = state[“messages”][–1] query = last_thought.replace(“Thought: QUERY:”, “”).strip() result = llm_tool(query) return {“messages”: [f“Action: query(‘{query}’)”, f“Observation: {result}”], “next_action”: “reasoning”, “iteration_count”: state.get(“iteration_count”, 0) + 1} |
The Process:
- Extract the query from the LLM’s reasoning (removing the “Thought: QUERY:” prefix).
- Execute the query using our llm_tool.
- Record both the action and observation.
- Route back to reasoning for the next decision.
Notice how this is more flexible than the hardcoded version — the agent can ask for any information it thinks is relevant!
Building the LLM-Powered Graph
The graph structure is identical to Part 1, but now the reasoning node uses LLM intelligence instead of hardcoded rules.
|
1 2 3 4 5 6 7 8 9 10 11 12 13 14 15 16 17 18 |
workflow_llm = StateGraph(AgentStateLLM) workflow_llm.add_node(“reasoning”, reasoning_node_llm) workflow_llm.add_node(“action”, action_node_llm) workflow_llm.set_entry_point(“reasoning”) workflow_llm.add_conditional_edges(“reasoning”, lambda s: s[“next_action”], {“action”: “action”, “end”: END}) workflow_llm.add_edge(“action”, “reasoning”)
app_llm = workflow_llm.compile() result_llm = app_llm.invoke({ “messages”: [“User: Tell me about Tokyo and Japan”], “next_action”: “”, “iteration_count”: 0 })
print(“\n=== LLM-Powered ReAct (No Mock Data) ===”) for msg in result_llm[“messages”]: print(msg) |
What’s Different:
- Same graph topology (reasoning ↔ action with conditional routing).
- Same state management approach.
- Only the reasoning logic changed – from if/else to LLM prompting.
This demonstrates the power of LangGraph: you can swap components while keeping the workflow structure intact!
The Output:
You’ll see the agent autonomously decide what information to gather. Each iteration shows:
- Thought: What the LLM decided to ask about.
- Action: The query being executed.
- Observation: The information gathered.
Watch how the LLM strategically gathers information to build a complete answer!
|
1 2 3 4 5 6 7 8 9 10 11 12 13 14 15 16 17 18 19 20 21 22 23 24 25 26 27 28 29 30 31 32 33 34 35 36 37 38 39 40 41 42 43 44 45 46 47 48 49 |
=== LLM–Powered ReAct (No Mock Data) === User: Tell me about Tokyo and Japan
Thought: QUERY: What is the history and significance of Tokyo in Japan?
Action: query(‘What is the history and significance of Tokyo in Japan?’)
Observation: Tokyo, originally known as Edo, has a rich history and significant role in Japan. It began as a small fishing village until Tokugawa Ieyasu established it as the center of his shogunate in 1603, marking the start of the Edo period. During this time, Edo flourished as a political and cultural hub, becoming one of the world‘s largest cities by the 18th century.
In 1868, after the Meiji Restoration, the emperor moved from Kyoto to Edo, renaming it Tokyo, meaning “Eastern Capital”. This transformation marked the beginning of Tokyo’s modernization and rapid development. Over the 20th century, Tokyo faced challenges, including the Great Kanto Earthquake in 1923 and heavy bombings
Thought: QUERY: What are the major cultural and economic contributions of Tokyo to Japan?
Action: query(‘What are the major cultural and economic contributions of Tokyo to Japan?’)
Observation: Tokyo, as the capital of Japan, is a major cultural and economic powerhouse. Culturally, Tokyo is a hub for traditional and contemporary arts, including theater, music, and visual arts. The city is home to numerous museums, galleries, and cultural sites such as the Tokyo National Museum, Senso–ji Temple, and the Meiji Shrine. It also hosts international events like the Tokyo International Film Festival and various fashion weeks, contributing to its reputation as a global fashion and cultural center.
Economically, Tokyo is one of the world‘s leading financial centers. It hosts the Tokyo Stock Exchange, one of the largest stock exchanges globally, and is the headquarters for numerous multinational corporations. The city’s advanced infrastructure and innovation in technology and industry make it a focal
Thought: QUERY: What are the key historical and cultural aspects of Japan as a whole?
Action: query(‘What are the key historical and cultural aspects of Japan as a whole?’)
Observation: Japan boasts a rich tapestry of historical and cultural aspects, shaped by centuries of development. Historically, Japan‘s culture was influenced by its isolation as an island nation, leading to a unique blend of indigenous practices and foreign influences. Key historical periods include the Jomon and Yayoi eras, characterized by early settlement and culture, and the subsequent periods of imperial rule and samurai governance, such as the Heian, Kamakura, and Edo periods. These periods fostered developments like the tea ceremony, calligraphy, and kabuki theater.
Culturally, Japan is known for its Shinto and Buddhist traditions, which coexist seamlessly. Its aesthetic principles emphasize simplicity and nature, reflected in traditional architecture, gardens, and arts such as ukiyo–e prints and later
Thought: I have gathered enough information |
Wrapping Up
You’ve now built two ReAct agents with LangGraph — one with hardcoded logic to learn the mechanics, and one powered by an LLM that makes dynamic decisions.
The key insight? LangGraph lets you separate your workflow structure from the intelligence that drives it. The graph topology stayed the same between Part 1 and Part 2, but swapping hardcoded logic for LLM reasoning transformed a rigid script into an adaptive agent.
From here, you can extend these concepts by adding real tools (web search, calculators, databases), implementing tool selection logic, or even building multi-agent systems where multiple ReAct agents collaborate.


